Category: Recipe

Recipe File: DIY Dry Aged Prime Rib Roast

I do this to myself way too much. I choose a bold new never-before-tried thing to cook when it’s a big holiday and I have guests. Then I fret the entire time over whether or not I can pull it off.

Thankfully this worked out. Tonight we enjoyed large cuts of pretty much perfect Prime Rib. Here’s how you do it:

Ingredients:

1 5-8 pound USDA Choice or Prime standing rib roast
Fresh pepper
Sea Salt
Olive oil
1/4 cup water
1/4 cup dry white wine

First, dry age the roast. When it’s done it will look a lot like this:

Crusty!

Once aged, trim off the leathery and any moldy parts. Take a small amount of olive oil and coat the entire roast. You can use extra light for this but I personally love the flavor of olive oil so I used regular. Rub the roast all over with sea salt and the fresh pepper.

In a small-enough-to-hold-the-roast roasting pan, combine the water and white wine and set the roast rib side down in the pan. Place in oven and roast for five hours @ 200 degrees or until the internal roast temperature is 120 degrees. Once the roast is at 120 degrees in the center, crank up the oven to 500 degrees for 15 minutes. Remove the roast. It should look something like this:

OMG better than brisket.  Ok that's a lie NOTHING is better than brisket.

Let the roast sit for no less than 30 minutes. Carve it off the bones. Then carve out steaks. You should end up with a fantastic juicy cut of prime rib that, depending on the quality of meat you started with, is almost indistinguishable from an expensive chophouse cut of rib. Enjoy!

Thanksgiving Dinner 2008

I’ve written before about my yearly tradition of doing different things each thanksgiving food wise.

This year I’ll be doing my quail recipe but will also be doing a prime rib roast. I’m very excited about this because it’s the first time I’ve gotten the roast far in advance to dry age it in the fridge. Aging the meat allows for natural enzymes to break down the muscle tissue of the meat. In addition the meat becomes dehydrated slowly, leaving behind a much more flavorful steak.

Now, there’s a lot of opinion in general about dry aging your meat yourself. Almost all the meat you’re going to get at retail grocery stores is wet aged. That means basically it’s been sitting in a vacuum sealed crypack in a fridge in with its own blood. Yes, that helps, and it reduces the volume of meat lost to dehydration and having to trim the aged cut to remove the non-edible bits. If you buy your meat from a specialty butcher you can often request they do the dry aging themselves. This is preferable because aging meat actually requires a relatively specialized environment, with specific humidity and air flow for optimal results. However I’ve been told by numerous cooks you can achieve the desired effect yourself if you’re willing to go through the trouble.

So I’m going to try it! WARNING: doing this you accept the risk that you’re going to ruin a perfectly good (and expensive!)piece of meat. If your fridge isn’t clean or there’s something oderous in it like onions or something the meat might pick that up as it ages.

We start off with a 5.5 pound standing USDA choice rib roast. Prime would be better, but since it’s pretty hard to find, Choice works. You can get this from a butcher or Costco. It’s very rare to find a decent cut quality from a major chain unless it’s a boutique one like Whole Foods. I’ve been advised not to try this with USDA Select so know your meats!

Unwrap the meat and rinse it and pat it dry. Find a nice dish that you can keep it in, but it’s going to age uncovered. Again there is some debate about aging it yourself whether you cover it in a cloth or not, we’re going commando for this one. My fridge has seperate temperature and other controls. So we’re going to place the roast in the meat storage drawer at the bottom of the fridge, and set that temperature range for somewhere between 36-40 degrees. Put it in, close the drawer.

I want to roast it now!

Now it sits until Thursday morning. I’ll check on it of course during that time to remove drippings trade out the dish, etc. On Thursday morning I’ll remove it, then it has to have all the dried bits and gunk trimmed off of it. I’ll photo that process as well. Then it goes into the oven for a slow roast at 200 or 225. Once it’s complete and I’ve verified I didn’t ruin it I’ll write this one up as a recipe file.

I hope it turns out like I think it might!

Recipe File: Braised Beef Short Ribs

Been a while since I did a recipe file entry. I love braised beef short ribs. Cooked properly, this simple meal is like an uber-thick beef stew and is perfect either by itself with a small salad side or fantastic ladled over steamed jasmine rice.

I’ve been cooking some all day so let’s get to the recipe. Cook time is five(!) hours.

Ingredients:

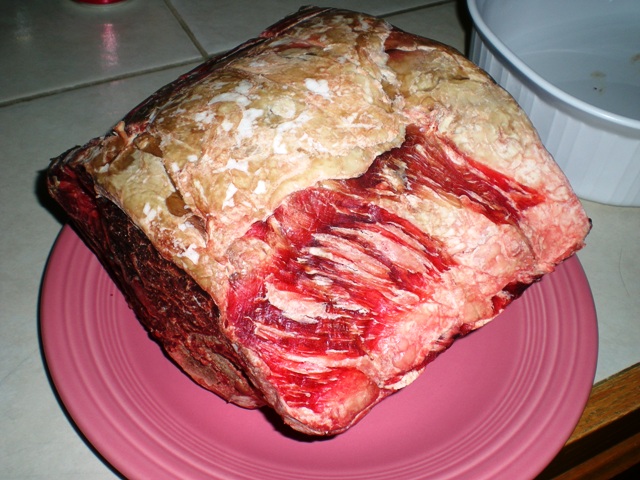
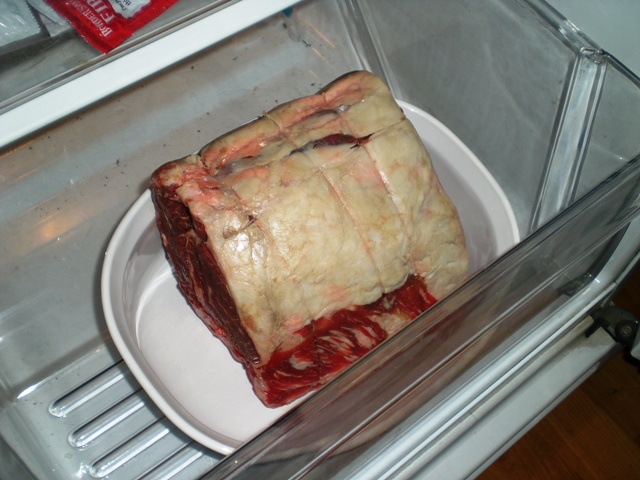
3 pounds cut beef short ribs
3 tablspoons extra light, extra virgin olive oil
1 yellow onion
3 medium size Yukon Gold potatoes
1 package whole mushrooms (washed)
1 celery stalk
1 whole carrot (peeled)
Three tablespoons crushed garlic
1/4 cup worcestershire sauce
2 large tomatoes, stewed (you can also use 1 can stewed tomatoes)
16 ounces red cooking wine
3 tablespoons fresh italian seasoning (dried can be used as well)
Fresh gound white pepper
Sea Salt

Stew the tomatoes any way you like, keeping in mind proper cook time all told for this recipe is five hours for best results so don’t go bonkers. I tend to be a kitchen prep fiend so while you’re stewing the tomatoes, go ahead and chop the celery into bite sized pieces and cut the whole carrot into 16’ths or so. Quarter and wash the potatoes, cut the onion into eighths. Leave the mushrooms whole.

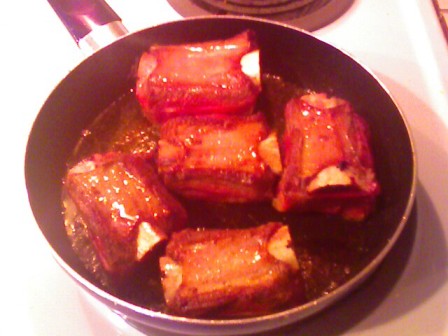
Salt and pepper liberally the short ribs. We’re going to be browning them first. Since we won’t really be adding any salt to this dish beyond what we are doing here don’t skimp! Don’t cake it on, but it’s fine to use much more salt here than you really feel comfortable with. There’s going to be so much liquid and we’re not adding any more, that remember you are really seasoning a whole dish here not just the ribs.

Brown the ribs meat side down for 5 minutes in the extra light olive oil. Mind the heat so the oil and beef fat doesn’t brown, but the effect we are going for is that of almost seared meat. This takes a while to do three pounds so I usually split it up in two batches.

YUM

While the meat is browning I prepare a nice sized, fairly deep baking dish with the italian seasoning (just dump it in the bottom and spread it around), the Worcestershire sauce, and the crushed garlic. Today I tended to have some rib cuts that were really thin, so after I browned them again on the rib side (use about half the time) I lined the dish with them and the vegetables like so:

YUM YUM

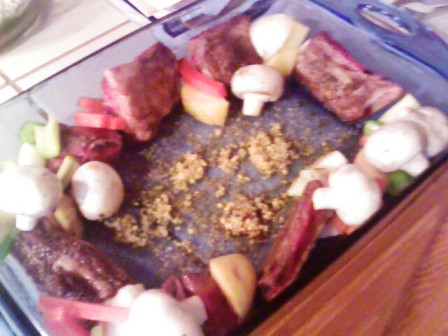
You want place them rib side down so the marrow from the bones leeches into the cooking sauce.

Then I layered in the meatier ribs in the center, again remember, rib side down. By now all vegetables and meat should be in the dish, I usually pour the stewed tomatoes on top. All you should be left with now is the 16 ounces of red cooking wine.

This I pour evenly over the whole baking pan. Ideally you should be looking at the pan being 50-75% level liquid wise if you are using a transluscent one like I am. Now, you can cheat and add some beef broth if you would like. It all depends on how much of a rush you are in and how big the bones are you are cooking off of. In this case I have a lot of time so we’re going commando as it were.

Ok cover the whole dish in foil. With your oven pre-heated at 250 put that baby in for a nice slow four hour cook time. The goal here is that right about 2 hours the liquid is boiling low but nicely and starting to really reduce. Over the next two hours the water content from the mushrooms and onion will really offset the reduction to the point that at hour four you’re looking not only at fork tender meat that’s flavorful but a nice thick sauce that’s heaven in a spoon from the reduction and marrow, but not overcooked or scorched.

The meat should be off the bone fairly easily, discard the bones and ladle what you have left over rice. Enjoy!